ZenML Pipeline Tutorial Part 2: Adding MLflow to a ZenML Pipeline
Introduction
In this tutorial, we will integrate MLflow into a ZenML pipeline for tracking machine learning experiments. MLflow is an open-source platform to manage the ML lifecycle, including experimentation, reproducibility, and deployment.
We will enhance a simple training pipeline that uses a RandomForestClassifier from Scikit-learn. You can find the detailed explanation of each part of the code in my previous article here.
Prerequisites
Before we begin, make sure you have the following installed:
- Python (3.7 or above)
- ZenML
- MLflow
- Scikit-learn
- Numpy
You can install the required packages using pip:
pip install zenml mlflow scikit-learn numpy
Step 1: Define Your Pipeline
We’ll create the training pipeline in pipelines/training_pipeline.py. Below are the code snippets for the training and evaluation steps where we incorporate MLflow.
Training the Model
First, we will create a function to train our model and log relevant parameters using MLflow.
from zenml import step
from sklearn.ensemble import RandomForestClassifier
from typing import Annotated
import numpy as np
import mlflow

@step(enable_cache=False)
def train_model(
    X_train: Annotated[np.ndarray, "X_train"],
    y_train: Annotated[np.ndarray, "y_train"]
) -> RandomForestClassifier:
    """Train a RandomForest model on training data."""
    model = RandomForestClassifier()

    with mlflow.start_run():
        model.fit(X_train, y_train)
        mlflow.log_param("n_estimators", model.n_estimators)
        mlflow.log_param("max_depth", model.max_depth)

    return model
In this code:
- We define a ZenML step named
train_model. - We instantiate a
RandomForestClassifier. - We start an MLflow run using
with mlflow.start_run(), which encapsulates the training context. - We log model parameters such as
n_estimatorsandmax_depthusingmlflow.log_param().
Evaluating the Model
Next, we will create a function to evaluate the trained model and log its accuracy.
from zenml import step
from sklearn.metrics import accuracy_score
import logging
from typing import Annotated
from sklearn.ensemble import RandomForestClassifier
import numpy as np
import mlflow

@step(enable_cache=False)
def evaluate_model(
    model: RandomForestClassifier,
    X_test: Annotated[np.ndarray, "X_test"],
    y_test: Annotated[np.ndarray, "y_test"]
) -> None:
    """Evaluate the trained model on test data."""
    logging.info("Evaluating the model...")
    predictions = model.predict(X_test)
    accuracy = accuracy_score(y_test, predictions)

    with mlflow.start_run():
        mlflow.log_metric("accuracy", accuracy)

    logging.info(f"Model accuracy: {accuracy}")
    print(f"Accuracy: {accuracy}")
In this evaluation step:
- We retrieve predictions from the model and compute the accuracy.
- We start another MLflow run to log the accuracy metric with
mlflow.log_metric().
Step 2: Run Your Pipeline
Once you’ve defined your pipeline, you can run it through ZenML. Ensure that you have set up ZenML correctly, and then execute:
zenml pipeline run
This will train and evaluate your model while logging all relevant metrics and parameters in MLflow.
Step 3: Running MLflow
To run MLflow, you need to start the MLflow server, which allows you to log, track, and visualize your experiments. You can do this by executing the following command in a terminal:
mlflow ui
By default, this will start the MLflow UI at http://127.0.0.1:5000. You can navigate to this URL in your web browser to access the dashboard where you can view your logged experiments, parameters, metrics, and models.
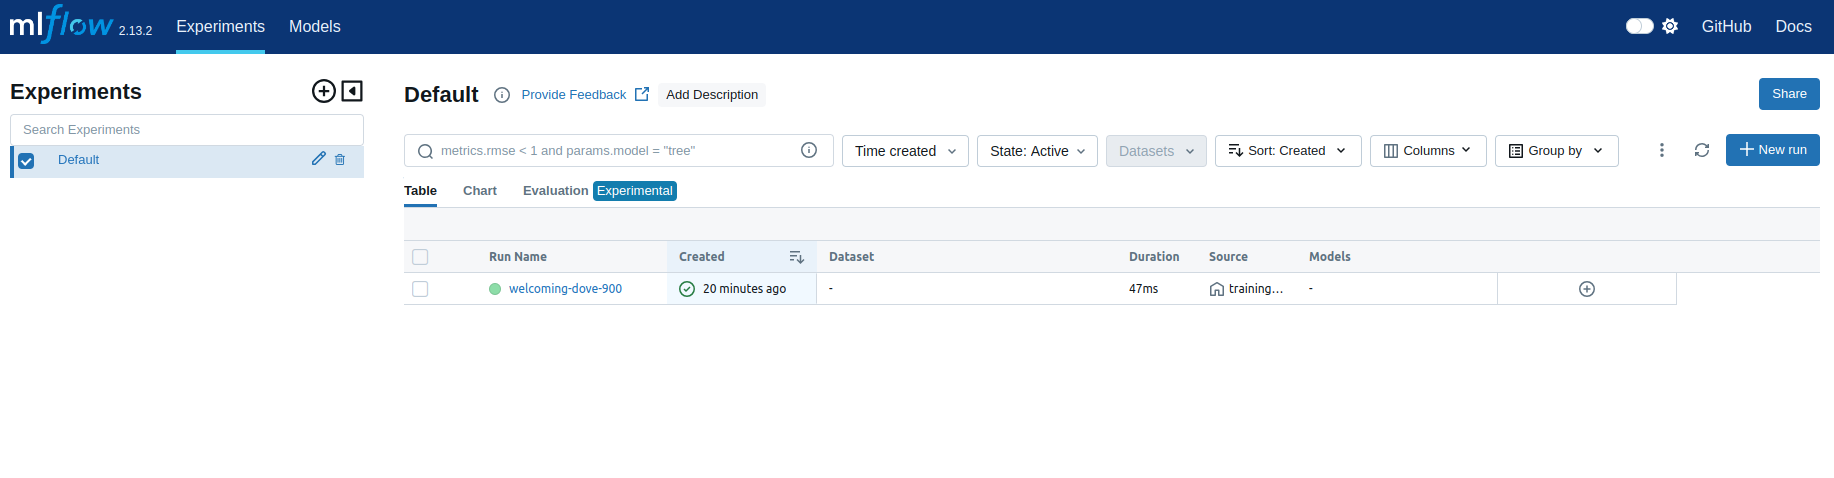
This screenshot displays the MLflow “Experiments” dashboard, specifically focusing on the “Default” experiment. It shows a single run titled “welcoming-dove-900” that was created 20 minutes ago, with a duration of 47ms. The source of the run is identified as training_pipeline.py, but no datasets or models were logged. This view provides an at-a-glance summary of all runs within the selected experiment, allowing users to track and manage their machine learning experiments efficiently.
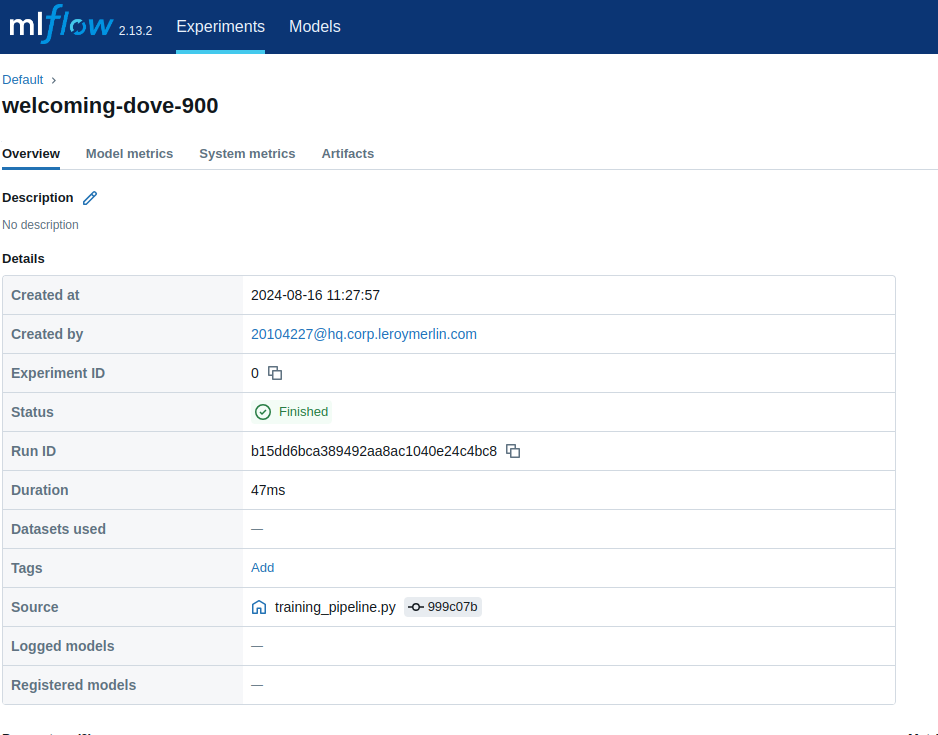
This MLflow interface screenshot provides a detailed overview of the “welcoming-dove-900” run. It includes critical metadata such as the creation time (2024-08-16 11:27:57), the user who initiated the run, the experiment ID (0), and the run’s status (finished). The run lasted for 47ms and was sourced from the training_pipeline.py script. The unique run ID is displayed, and although no datasets, tags, or models were logged or registered, this information helps trace and audit the model training process efficiently.
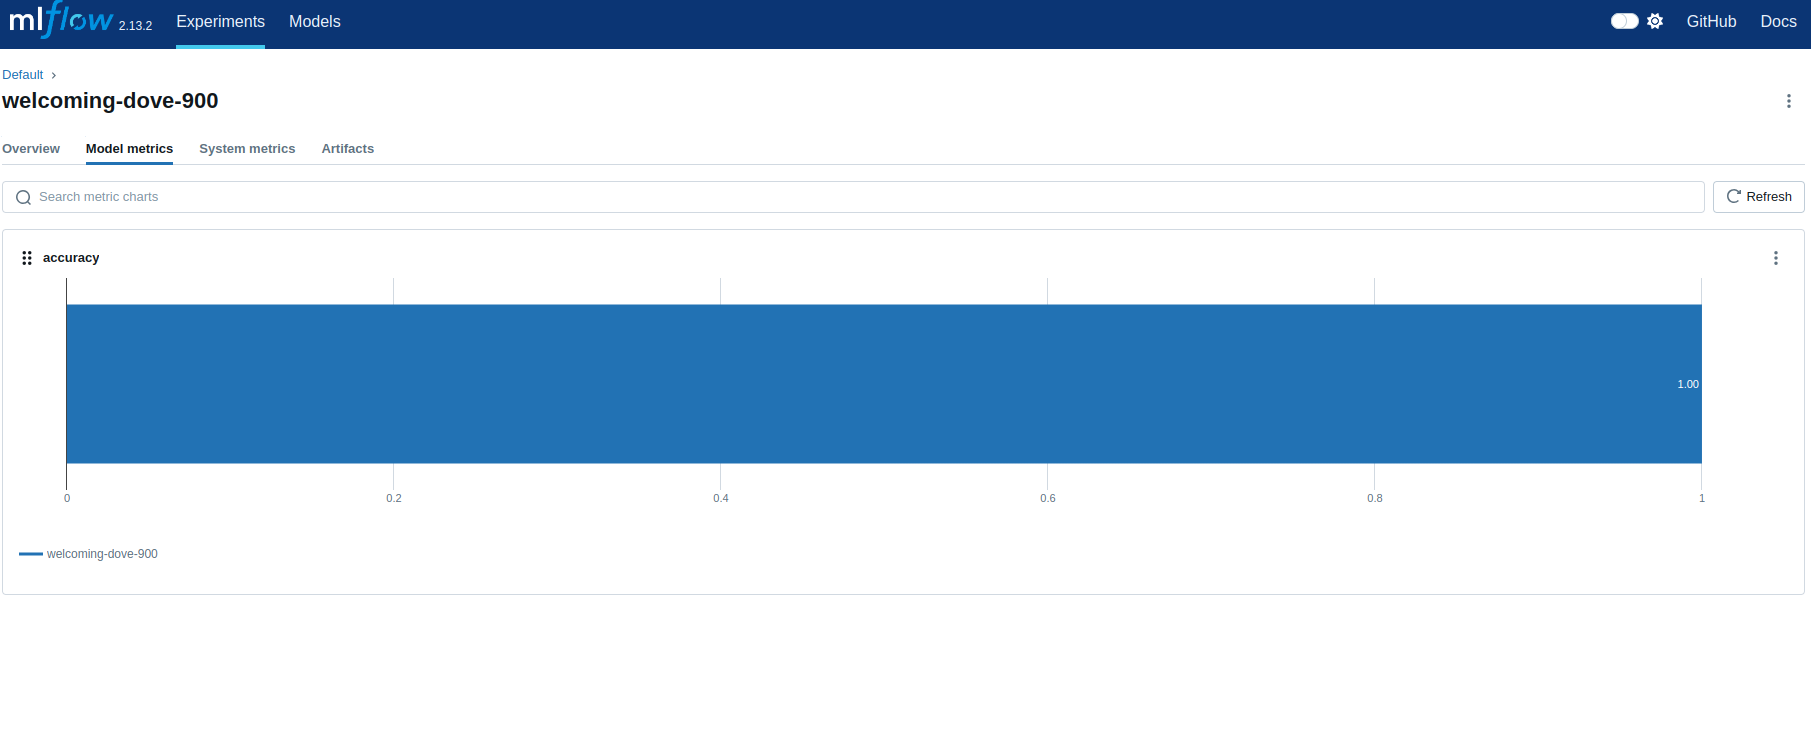
This MLflow interface screenshot showcases a model evaluation run named “welcoming-dove-900,” where the key metric displayed is “accuracy.” The accuracy score of 1.00 indicates that the model has achieved perfect accuracy on the test dataset. This level of precision might suggest overfitting, where the model has performed exceptionally well on the training data but may not generalize well to unseen data. The chart visualizes this metric clearly, offering a concise view of the model’s performance during this specific run.
Why Use MLflow in Your Pipeline
Integrating MLflow into your machine learning pipeline provides several advantages:
-
Experiment Tracking: Easily log and organize your experiments, allowing you to track what parameters and configurations yield the best results.
-
Model Versioning: Keep a history of model versions in a structured manner, making it easier to revert or compare previous iterations.
-
Visualization: The user-friendly MLflow UI offers visualizations for metrics across different runs, helping you analyze model performance effectively.
-
Reproducibility: Logging all the configurations and metrics ensures that you can reproduce the training process later, which is essential in a collaborative data science environment.
-
Integration: MLflow integrates seamlessly with many existing tools and libraries, enhancing your workflow without significant changes to your existing codebase.
Conclusion
By adding MLflow to your ZenML pipeline, you can effectively track your machine learning experiments, making it easier to monitor, analyze, and reproduce your work. The integration shown in this tutorial allows you to log important parameters and metrics in a structured way.
For further reading on ZenML and MLflow, you can check their respective documentation:
Happy experimenting!